Seating charts feel hard because they mix logistics with feelings. The logistics part — how many seats, which tables — is arithmetic. The feelings part — who should sit near whom — is where couples lose evenings. The method below separates the two: settle the arithmetic first, write the feelings down as explicit rules, and only then start placing names.
The ten steps
- Wait for the RSVP deadline. Starting before most replies are in means doing it twice. Begin the week after your RSVP deadline, roughly three to four weeks before the wedding.
- Clean the guest list. One person per row, full names spelled the way they should appear on the chart, and a household value for couples and families. Remove declines.
- Confirm tables with the venue. Get the number of tables, their shapes and the real seat count per table, plus any table that is fixed (head table, sweetheart table, kids' table).
- Sketch the room. Mark the entrance, dance floor, bar, stage or DJ, and restrooms. Place the couple's table first, then families nearest to it.
- Write the must rules. Who must share a table? Who must never share one? Keep this list short: only rules you would genuinely be upset to see broken.
- Seat the VIP tables. Parents, grandparents and the wedding party. Decide head table or sweetheart table now, because it changes how many people the other tables hold.
- Group everyone else. Group guests by how they know you — family branches, school friends, work friends — and assign each group to a table or a pair of neighbouring tables.
- Place the leftovers. Every wedding has guests who don't fit a group. Seat each one with at least one person they know, or with friendly guests who share an interest.
- Check the plan. Count seats per table, confirm no rule is broken, read every table aloud to someone who knows the families, and check accessibility needs.
- Export and share. Make the seating sign, the escort or place cards, and a table-by-table list with meal choices for the caterer.
Do steps 5–9 in minutes: write your rules, then let SeatFinch auto-seat.
Start planning freeDoing it with software
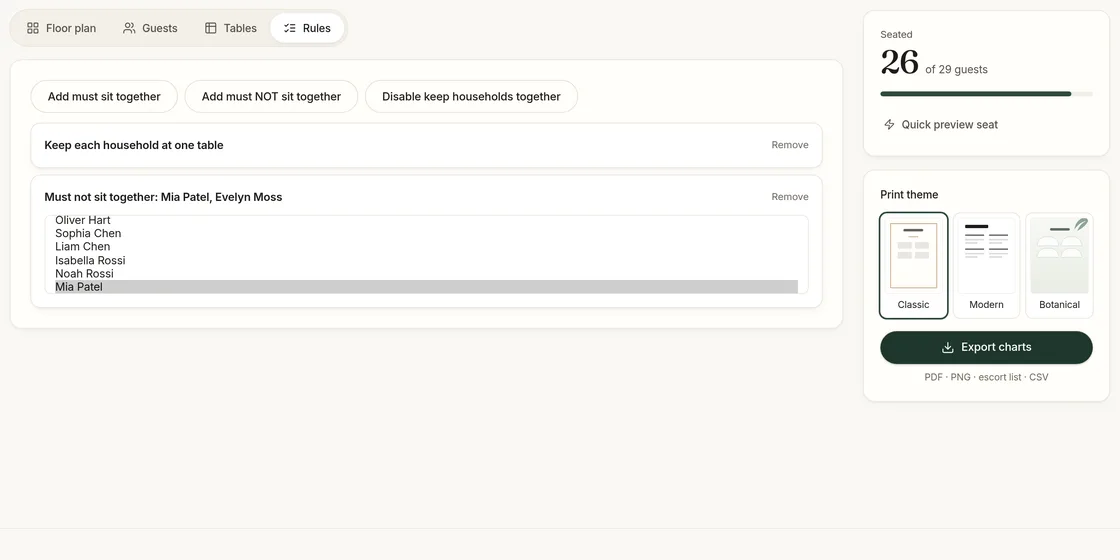
Steps 5 to 9 are where a seating chart maker earns its keep. In SeatFinch you import your cleaned list as a CSV, add your tables with their capacities, write the rules ("must sit together", "must not sit together", "keep households together") and press Auto-seat. You get a complete plan that keeps every rule; if two rules contradict each other, you are told which ones. From there you drag individual guests to fine-tune.
Doing it on paper
If you prefer paper, the method is the same. Print a blank seating chart template for your number of tables, write each guest’s name on a small sticky note (colour-coded by side of the family helps), and move the notes until the plan works. Write your rule list on the side of the board so you check it every time you move someone. Photograph the board when you are done, so a curious nephew can’t rearrange it.
Common mistakes
Starting with the hardest guest. It is tempting, but it is easier to fill the obvious tables first and then see where the difficult cases fit.
A singles table. Seating every single guest together often feels pointed. Spread them among friendly tables instead.
Forgetting vendors. Your photographer, planner and band may need seats and meals. Ask whether they eat with guests.
Changing the plan after printing. Late changes happen; build a buffer of one or two free seats so you can absorb them without reprinting.
How long it takes
With a clean list and a decided table count, a 100-guest wedding usually takes an evening or two by hand. Most of that time goes into steps 7 and 8. With auto-seating, the first draft appears immediately and the time goes into reviewing it — which is the part that actually needs you.
Related guides: wedding seating etiquette, when to make your seating chart, and escort cards vs place cards.
Last updated 2026-11-02